Introduction
A theme is a prebuilt set of colors, fonts, and visual effects. Every theme is made up of a number of layouts, that is how a scene is graphically represented.
When creating your Shape, you can take advantage of some predefined themes already available in Shape, but you can also create your own themes and your own layouts to be used to display your Shapes.
The images and the sounds in your Shapes are automatically chosen by the Shape artificial intelligence, on the basis of the input source, and cannot be included in a theme.
This article is a guide on how to create and manage themes and layouts in Shape.
Creating a New Theme
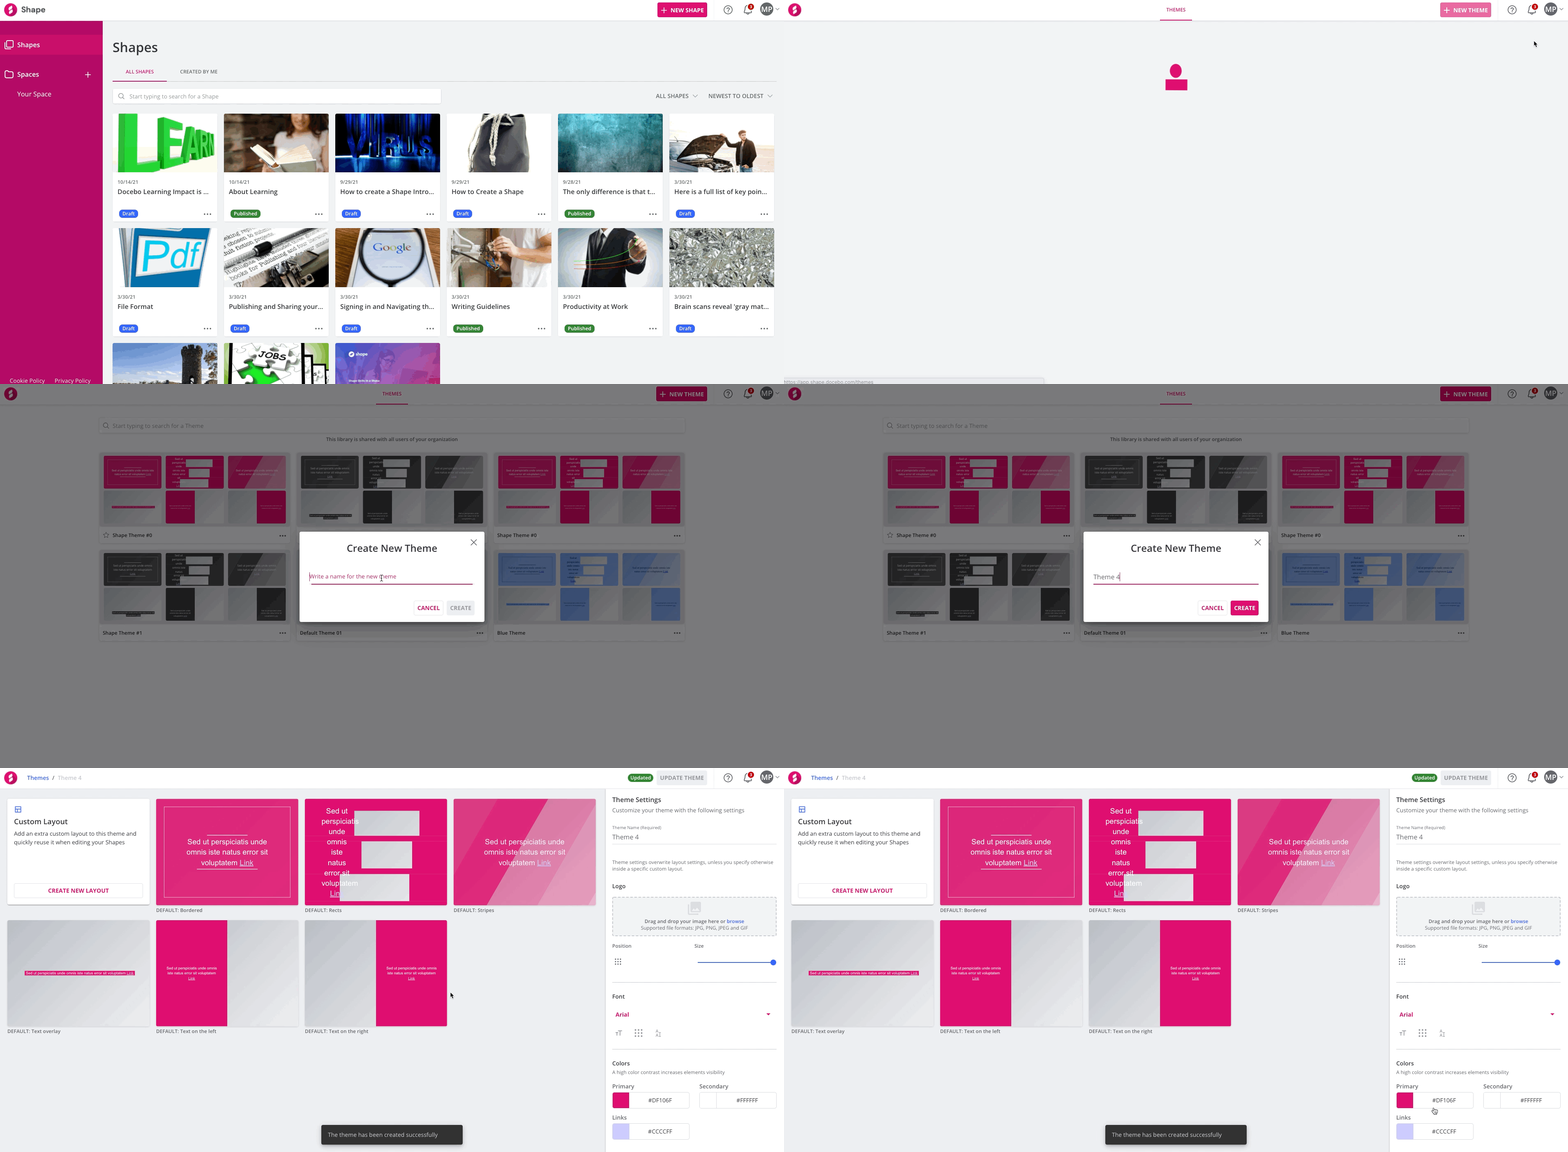
To create a new theme, log in to your platform, then click on your profile button in the top right corner of the page, and select the Themes option. You will access the Themes main page, a gallery listing all of the pre-built themes, as well as the themes you have already created in your platform.
In order to create a new theme, click on New Theme in the page header and set a name for your theme in the pop-up that will open. Choose a name so that you can easily identify it in the list of themes, in the Themes main page. Press Create to proceed.

You will land on the main page to configure your theme. The Theme Settings are listed on the right side of the page, while on the left side you will see the default layouts already associated with your theme. From here, you can optionally or create or edit custom layouts (please refer to the Creating and Managing Layouts chapter of this article for more information). Please note that you cannot edit the default layouts.
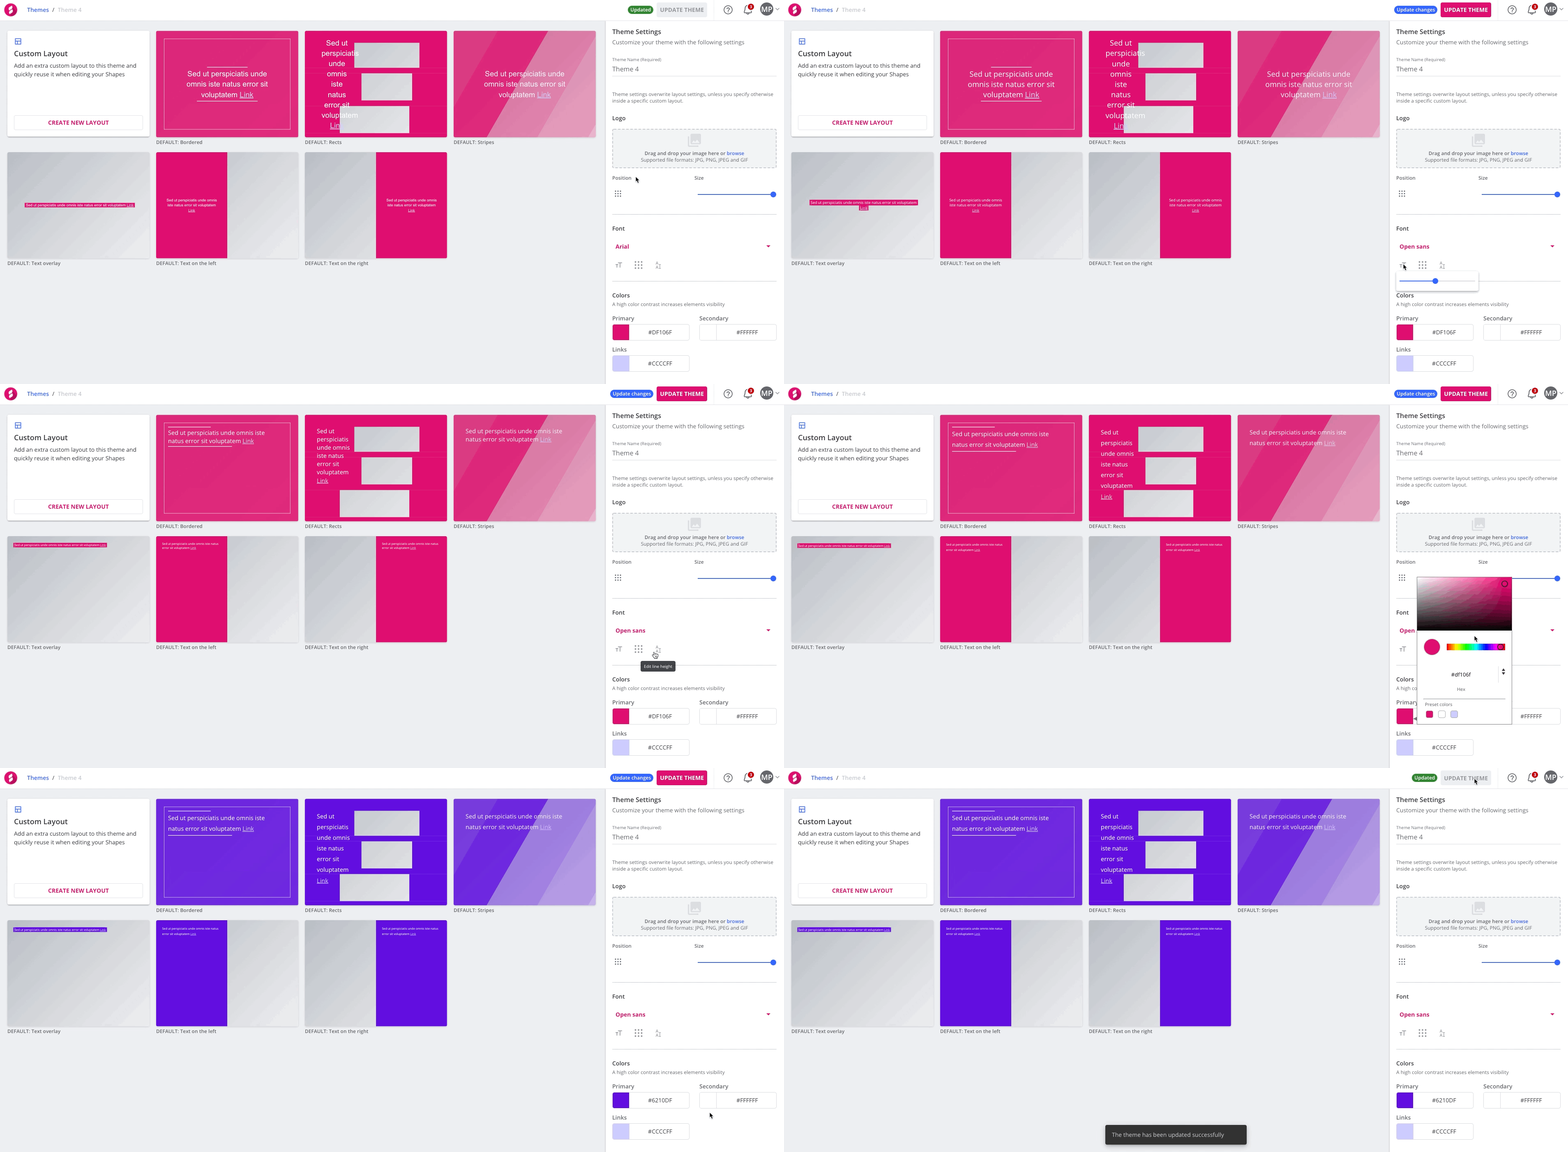
In the Theme Settings area, you can update the theme name (if needed), upload a default logo that you will still be able to change for every layout composing the theme (e.g. to show a logo with a different color for higher contrast with the layout background). You can set a default logo position and size for the theme, and then customize them for every layout. Either drag and drop your logo image into the upload section or press Browse to find it on your device. The supported file types for the logo image are .jpg, .jpeg, .png and static .gif. The image maximum size is 20MB.
Once you have uploaded your logo image, set the default logo position by selecting among the available options. Set whether the logo size will by default be small, medium or large in the Size area.
Move to the Font section to select the font among those available, or upload a new font by selecting the Company Fonts option and by dragging the font in the dedicated area or pressing the Browse button to find it on your device. Please note that the new font must be in ttf format. You can set the font size, the position of the text, and the line spacing. The font size is expressed as a percentage of the screen size and resizes according to the screen dimension.

Configure now the colors for the background and for the text. The primary color identifies the default background color, the secondary color identifies the default text color and the links color is for the colors of links in the content.
Click Update Theme in the top right corner of the page to finalize the creation of your theme. Congratulations! The new theme has now been created and will be available to all content creators in your platform.
Creating and Managing Layouts
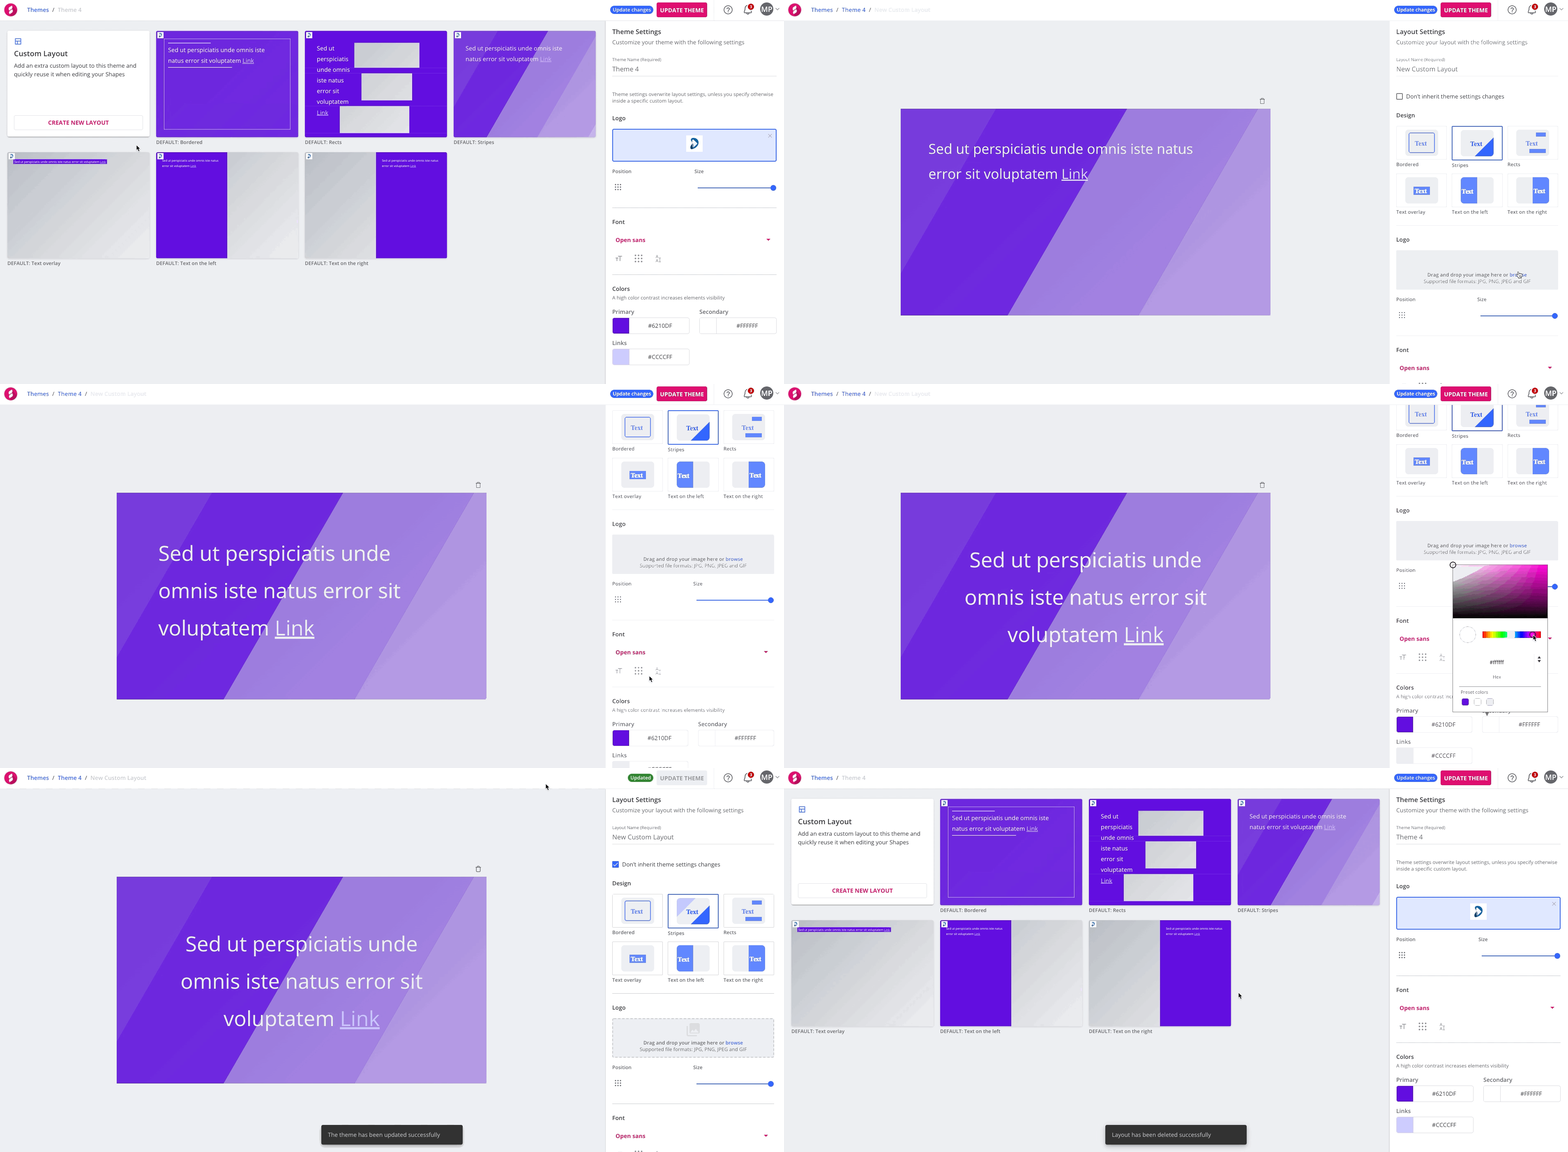
The default layouts associated with your theme are listed on the left side of the theme page. From here, click on Create New Layout to add a new layout to the selected theme or click on the custom layout cards to edit the existing ones. You cannot edit the default layouts.
The layout configuration options are listed in the Layout Settings area of the page. You will be required to set a name for your layout. The general configuration options are inherited from the theme settings, but you can customize them according to your preferences. If you flag the Don’t inherit theme settings changes checkbox, your layout settings will not be affected when you change the general theme settings.
To proceed in the configuration of the new layout, select a layout design in the corresponding section, and optionally change the font, the colors, and the logo image, position and size. If you want to hide the logo in a specific layout, you can remove it by clicking on the X button in the top right corner of the drag and drop area. You can also change the font, font size, spacing, and colors.

Once you are done with the configuration, press Update Theme in the top right corner to save your changes. Your new layout will now appear in the theme page.
If you want to delete a layout, select it from the list of layouts and click on the bin icon in the top right corner of the layout area. Please note that you cannot delete the default layouts. If you delete a layout that is currently in use in your Shape, the scenes created with this layout will be converted to the Default Text Overlay layout. Please note that you cannot restore a deleted layout.
Managing Themes
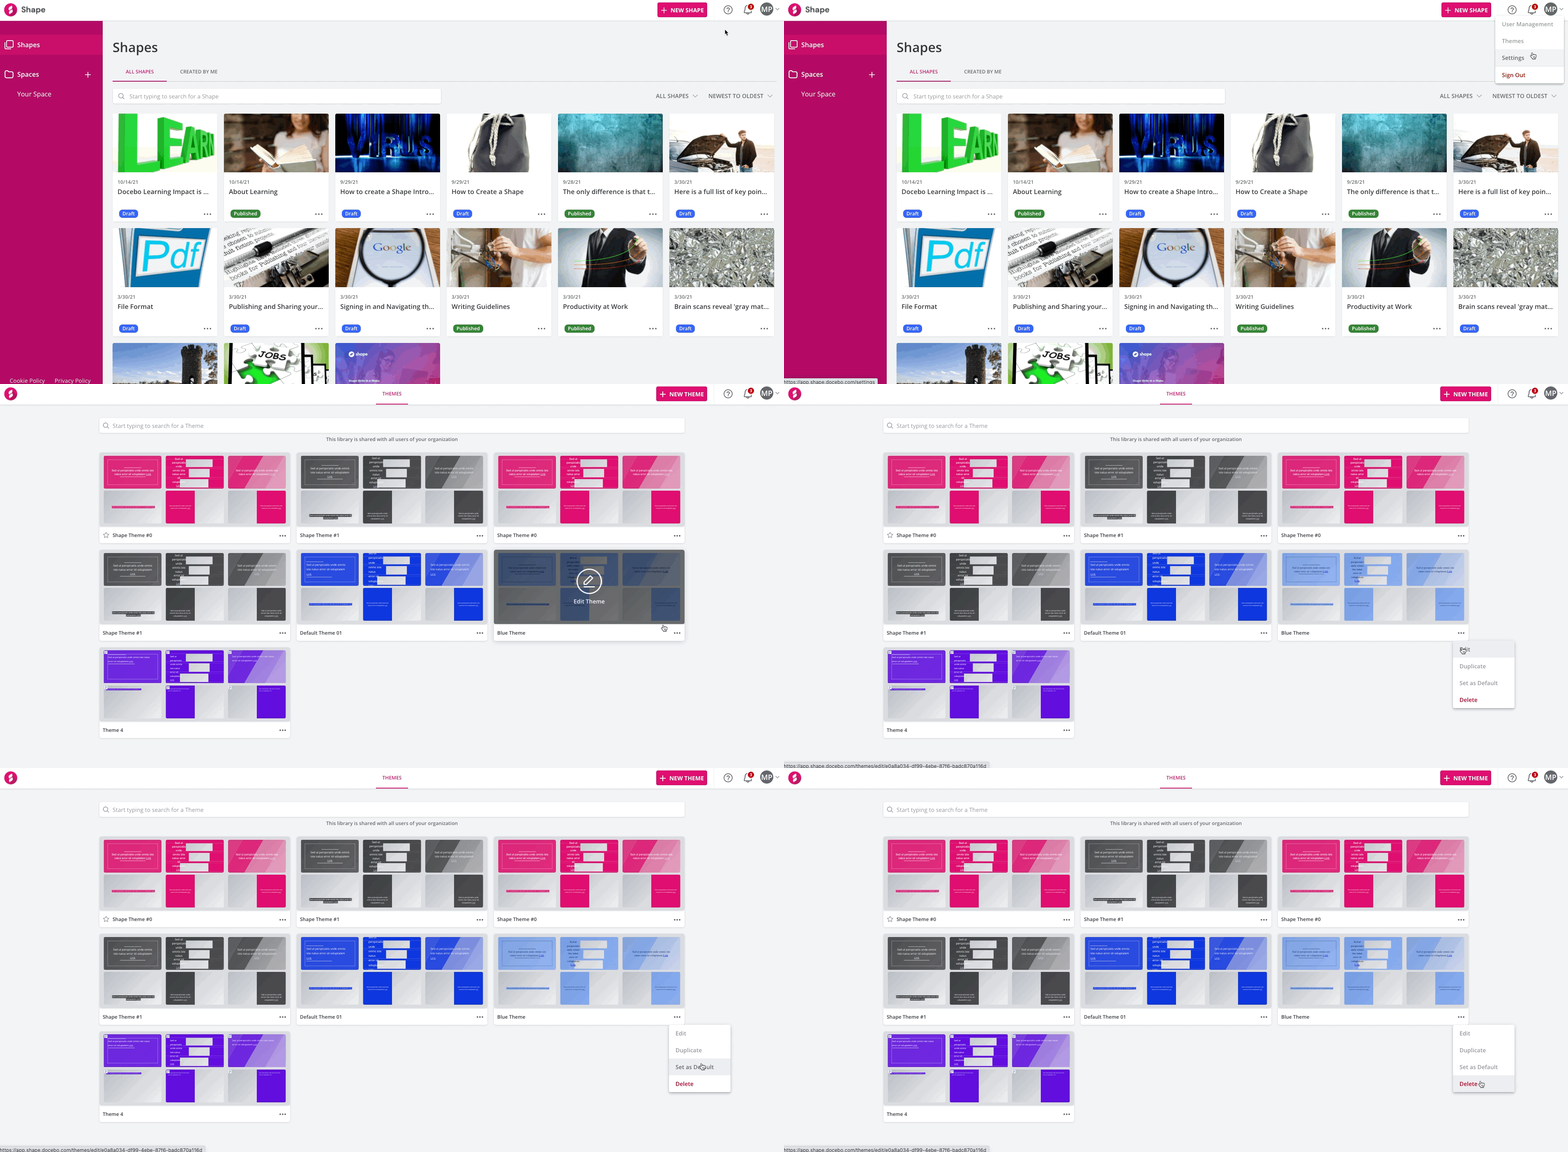
All of the themes available in Shape are listed in the Themes page. Click on the ellipsis button in the theme card to take advantage of the following management options:
- Edit. Update the theme options
- Duplicate. Make a copy of the theme. Set a name for the new theme
- Set as default. Set the theme as the default selected theme for the theme creation procedure. The default theme is identified by a star in the theme card.
- Delete. Permanently delete the theme. When a theme is deleted, it cannot be restored. The theme of the Shapes created with this theme will be replaced with the default theme. If the Shapes are published, you will need to re-publish them in order to see the default theme applied. Please note that you cannot delete the theme you set as default.
