Introduction
This article details the Docebo Connect for Microsoft Outlook 365 Calendar integration, which synchronizes Docebo VILT session invitations with users' Outlook calendars. It leverages Docebo Connect to automate workflows and data exchange between the platforms. The guide covers configuration steps for both Docebo and Outlook, and managing related settings like webhooks. This integration streamlines scheduling, ensuring learners can easily add virtual training sessions to their personal calendars.
Docebo Connect is a Docebo module acting as a connector between your platform and third-party SaaS systems, helping you to integrate your platform with more than 400 third-party external systems, reducing the integration effort.
Docebo Connect offers a large catalog of connectors for the most popular SaaS systems, to manage automated workflows (called recipes) shared among systems in order to exchange and share data on the basis of triggers.
Please note that Docebo Connect takes advantage of the APIs and business logic already existing in the integrating systems and does not create new ones. In addition, Docebo Connect does not manage SSO flows with Identity Providers (such as SAML, OpenID Connect, etc), JavaScript integrations (such as Google Analytics or Google Tag Manager) or iframe integrations (such as Docebo OEM or Salesforce Canvas).
Docebo Connect for Microsoft Outlook 365 provides a way to allow an Outlook 365 calendar account to supply invitations for enrolled VILT sessions to the enrolled users. This is achieved through the usage of a secondary Docebo integration and webhooks and provides the advantage of being able to integrate an Outlook 365 calendar without the use of .ics files with automated synchronization happening in near real-time.
For more information on the definition of terms and concepts used throughout this article, please read Docebo Connect Glossary of Terms.
Activating Docebo Connect
To activate Docebo Connect on your platform or sandbox, please reach out to your Docebo account manager. Please note that depending on the integration requirements, there may be associated costs.
Before you start
All the recipes for this integration can be found in the project's folder. This folder should be considered a “special folder” as all the recipes contained within are subject to automatic updates. As such, any customizations you make to recipes located within the folder can be overwritten by Docebo. In order to prevent such an occurrence, it is strongly advised to create a new project folder for any recipes you wish to use in production and copy or clone the recipes from the project's folder inside.
It is advisable to create a service account on Office 365 for use with the Docebo calendar integration. This service account must have a valid Office license. This can be an account that is in use by a person; however, using a separate account will prevent a personal account from being filled up by system-generated calendar entries. When testing this integration, if you have a staging platform, we suggest using separate Microsoft accounts for production and staging purposes.
For more information on how to clone recipes and edit the sub-recipe calls, please see Docebo Connect usage: Copying recipes.
A complete list of recipes used by this integration, including which sub-recipe they call, can be found in the chapter Recipe Descriptions.
Useful information
Docebo webhooks are used to send events to a secondary integration that creates the calendar entry. Please see Creating and managing webhooks for further information and to familiarize yourself with this feature of the platform.
- A Microsoft Office 365 Enterprise account is required.
- You will need to activate Docebo Connect for your Microsoft Outlook365 calendar to synchronize with Docebo. Please contact Docebo via the communication center to activate this for your Outlook 365 calendar integration. The necessary components will be added to your platform and the integration will be activated.
- Your Azure account must be a licensed account.
Please note: If the Enrollment Invitations Via External Calendar setting is deactivated for a particular course after invitations have been sent when the setting was active then any future updates to a session in the associated course where an invitation was previously sent will cause that event to be canceled in the learner's calendar.
Configuration
Configuring Docebo
In order for the integration to function properly, external calendars must be enabled on your platform. To do so click on the gears icon, then click on Advanced Settings and click on the ILT tab. Find the option Enrollment Invitations via External Calendar and activate the checkbox. Next click Save Changes.
Configuring Microsoft Outlook 365
In order to be able to connect to your Microsoft Outlook 365 calendar, you will need to note the name of the calendar you wish to synchronize with Docebo. To do so, first log in to your Outlook 365 account and click on the calendar icon to select your calendar.
Please note: Due to a Microsoft limitation, Docebo Connect for Microsoft Outlook 365 Calendar does not support sub-calendars and will not record the RSVP for the sub-calendar in Docebo. Only an account's primary calendar can be used with this integration.
The names of your calendars will be visible in the left side-bar of the Outlook 365 calendar view. Make a note of the exact name of the primary calendar as you will need this information later when configuring Docebo Connect.
Configuring Docebo Connect
Please note: Docebo Connect uses its own Client ID and Secret for the Outlook connector. For this reason they are not required when connecting using the Authorization code.
Next, log into the Docebo platform and click on the gears icon in the top right corner of your window. In the following screen find Docebo Connect and click on Manage.
In the Project Tab of Docebo Connect, create a new Outlook connection using your Microsoft account by selecting Connection in the left side-bar and then pressing the Create connection button.
Locate and click on the Outlook connector in the list of available connections.
In the following screen give your connector a name and select the location where you wish to save the connection in your project folders.
Next, press the Connection account type drop down menu. You will receive a choice of Common, Tenant specific, Consumer and Organization. Consult the table for more information on these account types:
| Connection account type | Description |
|---|---|
| Common | This option is the suggested option to choose. This option allows you to sign in using enterprise and multi-tenant accounts that are not restricted to a specific organization (tenant). |
| Tenant specific | This option is specifically designed for users who belong to a particular organization (tenant). |
| Consumer | This option supports personal Microsoft accounts. |
| Organization | This option supports work or school accounts. |
Next, in the Authentication type dropdown menu, select Authorization code grant, if it is not already the chosen authentication type.
Next, in the Requested permissions (Oauth scopes) box, located in the Advanced settings area, add the Calendars.ReadWrite permission.
Tip: If you are also sending invitations from a shared calendar, you should also add the Calendars.ReadWrite.Shared scope.
Then, press the Sign in with Microsoft button to continue.
Please note:
- In order to prevent possible issues, the scopes that are assigned to the connector must be given Application access. To access these permissions, in Azure navigate to App registrations. Then, in the left sidebar, expand the Manage option and select API permissions. You can find the permissions under Microsoft Graph in the table located under the Configured permissions section.
Connection account type Authentication type Target app Application / Delegated Common Authorization code grant Workato Delegated Tenant specific Authorization code grant Workato Delegated Tenant specific Client credentials Custom app Application Organization Authorization code grant Workato Delegated
You will then be presented with a window requesting permissions to access your data. Press the Accept button to continue.
You will receive confirmation that your connection has been successfully activated.
Configuring the integration-settings lookup table
Next, select the Lookup Table tab of Docebo Connect and locate the Integration Settings table.
Check to see if the following table entries are present, if not add the corresponding data to the table.
| Integration | Key | Value |
|---|---|---|
MSOUTLOOK
|
CALENDAR NAME
|
Your primary calendar's name, using exactly the name of the calendar you noted in Outlook earlier. |
MSOUTLOOK
|
DELETE WEBHOOK STORED BY MORE THAN X SECONDS
|
3600
|
MSOUTLOOK
|
ADD_INSTRUCTOR_FLAG
|
true
|
MSOUTLOOK
|
NOTIFICATION_MAIL_ID
|
The email address of the user to receive notification if any error occurs in a job. |
MSOUTLOOK
|
LMS_BASE_ID
|
The base URL of your Docebo platform, including protocol. Examples: https://yourdomain.docebosaas.com or your custom domain such as: https://training.example.com
This value is used
by the Outlook 365 recipes to populate the session link
in calendar
invitations via the
|
The key ADD_INSTRUCTOR_FLAG, when set to true, adds the instructor as an attendee in the Outlook event. If you do not wish to add the instructor as an attendee, set this value to false.
The key NOTIFICATION_MAIL_ID is the email address of the user (or distribution list, if it has a standard email address and can accept external emails) you wish to receive error messages, should one occur in a job.
The key LMS_BASE_URL stores the base URL of your Docebo platform. This value is read by the integration recipes and passed to the Outlook calendar event template as the lms_base_URI shortcode, so it is used to build the session URL shown in the calendar invite body.
If you have other Docebo Connect integrations configured and running, you may find data for those integrations also in this table. You may safely ignore those entries.
Configuring the integration-webhooks lookup table
Next, if it does not already exist, create a new lookup table called integration-webhooks. The integration-webhooks lookup table is used by the following recipes:
Add the following columns to the table (you do not need to add any values to the columns):
| Integration | Key | Value |
|---|
Webhooks
In order for the integration to be able to successfully synchronize with the remote calendar, a webhook must be configured between Docebo and Workato.
Click on the gear icon to access the administrative options, then locate Docebo Connect and press Manage. In the Project tab of Docebo Connect, locate the folder where you have stored your Outlook365 recipes and click on the recipe called Docebo Learn events dispatcher - Webhook.
Inside the recipe click on the first item in the recipe to reveal a slide-out window where you can find a URL that is needed to configure Docebo webhooks. Press the Copy button by the Workato webhook Address URL to copy the link to the clipboard.
Next, click on the gear icon and in the following window locate Webhooks and press Manage. Then press the plus button in the top right corner of the window to add a new webhook.
Give the new webhook a meaningful name and then paste the URL you copied in from the Docebo Learn events dispatcher - Webhook recipe into the Payload URL field. Next, press the Events button to select the events that will trigger the webhook. In the slide-out window select the following events:
- Course properties have been changed
- Ext Calendar ILT event changed
- Ext Calendar ILT session changed
- User has been unenrolled from a Learning Plan
Press the Confirm button to add the events to the new webhook, then, in the Group Payloads section, check Allow the platform to group payloads. Next, press Save Changes.
You will then be returned to the list of available webhooks where you can find your new item.
To activate the webhook, press the ellipsis button at the end of the row. In the resulting drop-down menu, select Activate. The status of the webhook will then be changed to Active.
Recipes
A complete list of all recipes can be found in the Recipe Descriptions chapter. The list of recipes contains information on what task the recipe performs, what event triggers the recipe to run, which recipe needs to be started manually and a list of sub-recipes called within each recipe. Certain recipes need to be started after all the tables and webhooks have been configured as they are triggered by a timed event. For more information on starting recipes, please see Docebo Connect Usage: Common Recipe Actions.
Connector errors when starting recipes
In the event that you receive an error message when starting the recipes, click on the recipe and move to the Connection tab. There you can select the appropriate connector to use with the recipe by pressing the right arrow next to the connection and then selecting your pre-configured connection in the Existing connections area.
Once the recipes that need to be started manually are all running, your integration will be ready for use.
Steps to take when creating an ILT Event
When creating a new course in Courses Management, click the Properties tab. Under Enrollment Options find Enrollment Invitations via External Calendar and activate the checkbox next to Enable external calendars' RSVP feature for all of the sessions of this course in order to enable this course to send invitations to external calendars, such as Microsoft Outlook 365.
Please note: If you enable the RSVP functionality at course level, after sessions and their events have already been created, those events are not automatically synchronized. To ensure proper synchronization, you need to update or recreate the events manually.. For more information see the article External calendar invitations and RSVPs for ILT courses.
If you wish to hide the list of attendees in the external calendar event for all the sessions and events related to this course, check the Hide attendees in the external calendar event for all the sessions and related events of this course box.
If you prefer, you can also define this action on a session by session basis by clicking on the Sessions tab and then clicking on the session you wish to turn this feature on or off for. In the Properties tab of the session, in the General section you will find Enrollment Invitations via External Calendar. By checking the box in this section, you are able to customize this feature. If you have previously checked the box in the Course Management / Properties section, you will find the radio button next to Enable the external calendars' RSVP option for this session selected, with the option being marked as default. Otherwise, if you did not previously turn on Enable external calendars' RSVP feature for all of the sessions of this course then the radio button next to the option Disable the external calendars' RSVP option for this session will be selected and that option will be marked as default. Simply activating the unselected radio button will override the default course setting for this particular session.
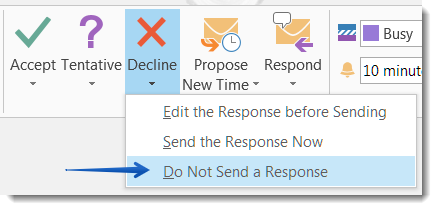
Please note: If attendees respond to an invite and reply using the Do Not Send a Response option in Outlook, the status of the RSVP will remain as "waiting" in the Docebo platform.
Managing the message template
Message templates in Docebo Connect allow you to customize the look and content of messages using shortcodes sent to your users via email. For more information about how message templates work and are configured, please see the Workato knowledgebase (opens in a new tab).
Template details
The message template used by the Docebo Connect for Microsoft Outlook 365 Calendar recipe makes use of the following inputs and their respective shortcodes:
| Input | Shortcode |
|---|---|
| Course ID | {{#course_id}} |
| Course name | {{#course_name}} |
| Course description | {{#course_description}} |
| Session ID | {{#session_id}} |
| Session name slug | {{#session_name_slug}} |
| Session name | {{#session_name}} |
| Session description | {{#session_description}} |
| Event ID | {{#event_id}} |
| Event name | {{#event_name}} |
| Event description | {{#event_description}} |
| Webinar tool | {{#webinar_tool}} |
| Location name | {{#location_name}} |
| Location address | {{#location_address}} |
| Location phone number | {{#location_phone_number}} |
| Location email | {{#location_email}} |
| Location direction | {{#location_direction}} |
| Location accommodations | {{#location_accommodations}} |
| Location other info | {{#location_other_info}} |
| Classroom name | {{#classroom_name}} |
| Classroom details | {{#classroom_details}} |
| Classroom seats | {{#classroom_seats}} |
| Classroom equipment | {{#classroom_equipment}} |
The template has been structured to display a value only if the value is actually defined.
For further customization of the template, for example If you wish to add additional inputs and shortcodes, please refer to the Workato knowledgebase (opens in a new tab).
Generating Session Links
The recipe Get message template is responsible for accessing and populating the message template with the required inputs, then generating the final content to be used as the calendar event description.
The session link is assembled via a combination of shortcodes and a set URL structure:
https://{lms_base_uri}/learn/course/{course_id}/session/{session_id}/{session_name_slug}Example:
If we are given the following parameters:
| Parameter | Value |
|---|---|
| Base URI of the platform |
platform.example.com
|
| Course ID | 190 |
| Session ID | 54 |
| Session Name | Example Session |
Then the values of the shortcodes will be:
| Shortcode | Value |
|---|---|
{{lms_base_uri}}
|
platform.example.com
|
{{course_id}}
|
190 |
{{session_id}}
|
54 |
{{session_name_slug}}
|
example-session |
Putting it all together, the session link will look like this:
https://platform.example.com/learn/course/190/session/54/example-sessionPlease note: The recipe Get message template already has the required values to generate the session link except the base URI.
There are two possible ways to add the session link to the message template:
- Generate the session link based on the example provided above directly in the recipe and then add a new input and shortcode as a session link to the message template
- Add base URI as input and shortcode to the message template and generate the session link in the message template using the shortcodes
The LMS base URL used in the session link is stored in the LMS_BASE_URL entry of the integration-settings lookup table for the integration. The Outlook 365 recipes read this value and pass it to the Outlook calendar event template as the lms_base_URI shortcode, which is then combined with course_id, session_id and session_name_slug to build the full session URL in the calendar event description.
Customizing message templates
If you have customized your message template, you will need to create a new template and edit the recipes where this template is populated. Described here are the steps needed to create a new message template as well as the calling recipe.
Please note: The recipe editing should be performed on your cloned recipes in order to prevent a recipe update from reverting back to the default message template. Please see Docebo Connect Usage: Copying Recipes for more information on copying recipes.
The steps needed to clone a message template should be performed in the following order:
- Create a new message template using the information from the original template
- Update the cloned recipe with the new message template information
An example template and the JSON file needed to create a new template that is compatible with the existing recipes is provided in this article and can be copied and pasted into Docebo Connect.
Creating a new message template
In order to create a new template, navigate to the Message templates tab in Docebo Connect.
Next, press the New template button to open the Message template editor.
In the following screen, press the pencil icon next to the New template title to give your template a name.
Next, move to the template body text box.
Tip: You can optionally expand this box, using the handle in the bottom right corner of the text box.
Then, copy the template body information provided here to your clipboard:
<html>
  <body>
    <div class="courseDetails">
      <p>
        <b><u><i>Course Details</i></u></b><br>
        {{#course_name}}
          <b>Course Name:</b> {{course_name}}<br>
        {{/course_name}}
        {{#course_description}}
          <b>Course Description:</b> {{&course_description}}<br>
        {{/course_description}}
      </p>
    </div>
    <div class="sessionDetails">
      <p>
        <b><u><i>Session Details</i></u></b><br>
        {{#session_name}}
          <b>Session Name:</b> {{session_name}}<br>
        {{/session_name}}
        {{#session_description}}
          <b>Session Description:</b> {{&session_description}}<br>
        {{/session_description}}
        {{#session_name_slug}}
          <b>Session URL:</b> Click <a href="https://{lms_base_URI}/learn/course/{{&course_id}}/session/{{&session_id}}/{{&session_name_slug}}" target="_blank">here</a> to access the session<br>
        {{/session_name_slug}}
      </p>
    </div>
    <div class="eventDetails">
      <p>
        <b><u><i>Event Details</i></u></b><br>
        {{#event_name}}
          <b>Event Name:</b> {{event_name}}<br>
        {{/event_name}}
        {{#event_description}}
          <b>Event Description:</b> {{&event_description}}<br>
        {{/event_description}}
        {{#webinar_tool}}
          <b>Webinar Tool:</b> {{webinar_tool}}<br>
        {{/webinar_tool}}
      </p>
    </div>
    {{#is_location_present}}
      <div class="locationDetails">
        <p>
          <b><u><i>Location Details</i></u></b><br>
          {{#location_name}}
            <b>Location Name:</b> {{location_name}}<br>
          {{/location_name}}
          {{#location_address}}
            <b>Location Address:</b> {{location_address}}<br>
          {{/location_address}}
          {{#location_phone_number}}
            <b>Location Contact:</b> {{location_phone_number}}<br>
          {{/location_phone_number}}
          {{#location_email}}
            <b>Location Email:</b> {{location_email}}<br>
          {{/location_email}}
          {{#location_direction}}
            <b>Location Direction:</b> {{&location_direction}}<br>
          {{/location_direction}}
          {{#location_accommodations}}
            <b>Location Accommodations:</b> {{&location_accommodations}}<br>
          {{/location_accommodations}}
          {{#location_other_info}}
            <b>Location Additional Info:</b> {{&location_other_info}}<br>
          {{/location_other_info}}
        </p>
      </div>
    {{/is_location_present}}
    {{#is_classroom_present}}
      <div class="classroomDetails">
        <p>
          <b><u><i>Classroom Details</i></u></b><br>
          {{#classroom_name}}
            <b>Classroom Name:</b> {{classroom_name}}<br>
          {{/classroom_name}}
          {{#classroom_details}}
            <b>Classroom Details:</b> {{&classroom_details}}<br>
          {{/classroom_details}}
          {{#classroom_seats}}
            <b>Classroom Available Seats:</b> {{classroom_seats}}<br>
          {{/classroom_seats}}
          {{#classroom_equipment}}
            <b>Classroom Equipments:</b> {{&classroom_equipment}}<br>
          {{/classroom_equipment}}
        </p>
      </div>
    {{/is_classroom_present}}
  </body>
</html>
Next, paste the template text into the Template body text box. The pasted text automatically highlights all the html used for formatting as well as all the input parameters.
Next, in the Template input field, press the Use JSON button.
Next, copy the following code to your clipboard:
{
  "course_id": "value",
  "course_name": "value",
  "course_description": "value",
  "session_id": "value",
  "session_name": "value",
  "session_name_slug": "value",
  "session_description": "value",
  "event_id": "value",
  "event_name": "value",
  "event_description": "value",
  "webinar_tool": "value",
  "location_name": "value",
  "location_address": "value",
  "location_phone_number": "value",
  "location_email": "value",
  "location_direction": "value",
  "location_accommodations": "value",
  "location_other_info": "value",
  "classroom_name": "value",
  "classroom_details": "value",
  "classroom_seats": "value",
  "classroom_equipment": "value",
  "is_location_present": true,
  "is_classroom_present": true
}
In the Generate schema window, select Paste JSON sample in the dropdown menu and paste the code into the JSON sample box, overwriting the existing curly brackets, then press Next.
In the next step, review the sample JSON tree and press the Generate schema button.
Returning to the previous screen, you will find the created Template input. To finish creating your template, press the Create button.
Your new message template is now created. In order to make use of the new message template, the recipe Get message template needs to be edited. In order to do so, navigate to the folder where your Microsoft Outlook 365 Calendar recipes are located and click on the Get message template recipe.
Next, in the recipe, press Edit.
In edit mode, locate and press the action called Create message using Outlook calendar event template template. In the resulting sidebar, locate the Document template dropdown menu and select your newly created template instead of the Outlook calendar event template. You will notice that once you change this template, the action will be updated. Next press Save and then start the recipe.
Recipe descriptions
Docebo Learn events dispatcher - Webhook
This recipe handles all the operations that synchronize Docebo events with Outlook calendar events. More specifically, the recipe is listening for all the webhooks to which the recipe is subscribed (they must be configured according to the Webhooks section of the Configuration chapter of this guide)
- Trigger
- Triggered via HTTP webhook
- Calls to other recipes
Create Outlook Events when Session Sync Enabled
The recipe creates all the events in the Outlook calendar when an existing VILT session becomes marked as RSVP.
- Trigger
- Triggered via function call
- Calls to other recipes
Add/Remove instructors from attendees
This recipe is responsible for adding or removing instructors assigned to or from the session as attendees.
- Trigger
- Triggered via function call
- Calls to other recipes
Create Update or Delete Outlook Calendar Event
This recipe creates, updates or deletes Outlook calendar entries based on changes in the event status within Docebo. For example, a created event in Docebo will create an event in the Outlook calendar whereas a change to an event in Docebo will update the calendar entry accordingly.
- Trigger
- Triggered via function call
- Calls to other recipes
Delete Outlook Sessions
This recipe deletes all the VILT session events from the Outlook calendar if the session has been deleted or unmarked as an RSVP session.
- Trigger
- Triggered via function call
- Calls to other recipes
Enable External Calendar's RSVP Option
This recipe is called when a course is updated. It updates all the future events of the course session in the Outlook calendar.
- Trigger
- Triggered via function call
- Calls to other recipes
Get all active enrollments by session id
This recipe is responsible for retrieving active enrolments by the provided session ID.
- Trigger
- Triggered via function call
- Calls to other recipes
-
- None
Get all events by session id
This recipe is responsible for retrieving events by the provided session ID.
- Trigger
- Triggered via function call
- Calls to other recipes
-
- None
Get all instructors from event ID
This recipe is responsible for retrieving the instructors assigned to the session events in the Docebo platform.
- Trigger
- Triggered via function call
- Calls to other recipes
-
- None
Get Docebo Learn future events
This recipe retrieves future session events after the date on which the recipe is called.
- Trigger
- Triggered via function call
- Calls to other recipes
-
- None
Get Location and Classroom name by ID
This recipe is responsible for retrieving a classroom's name and location by the ID in Docebo.
- Trigger
- Triggered via function call
- Calls to other recipes
-
- None
Get message template
This recipe creates a message using the Outlook calendar event template template
- Trigger
- Triggered via function call
- Calls to other recipes
-
- None
Manage External Calendars' RSVP Option
This recipe is responsible for managing the RSVP process.
- Trigger
- Triggered via function call
- Calls to other recipes
Retrieve Outlook Calendar event IDs by transaction ID/LMS session ID
The recipe is responsible for retrieving the Outlook Calendar event IDs
by iterating through all the Outlook calendar events and filtering them
by either transaction_ID
(<lms_session_id>-<lms_event_id>)
or lms_session_id.
- Trigger
- Triggered via function call
- Calls to other recipes
-
- None
RSVP sync from Outlook Calendar to Docebo learn
This recipe is responsible for synchronizing the response provided by the attendees in the Outlook events to the Docebo events.
- Trigger
- Triggered every five minutes automatically
- Calls to other recipes
Update Outlook Session Attendances
This recipe updates all the VILT session events in the Outlook calendar when the corresponding Docebo event is updated.
- Trigger
- Triggered via function call
- Calls to other recipes
Avoid Duplicate Webhook Running
This recipe can be found in the webhooks-checks subfolder. It monitors and prevents the duplication of Webhooks events.
- Trigger
- Triggered via function call
- Calls to other recipes
-
- None
Delete Webhook Record from LookupTable
This recipe can be found in the webhooks-checks subfolder. It is responsible for deleting the entries in the integration-webhooks lookup table.
- Trigger
- Triggered every hour automatically
- Calls to other recipes
-
- None