Introduction
Shape is a closed and protected network, meaning only registered users can access the platform.
This article is a guide on how to create and manage users in Shape.
Creating a New User
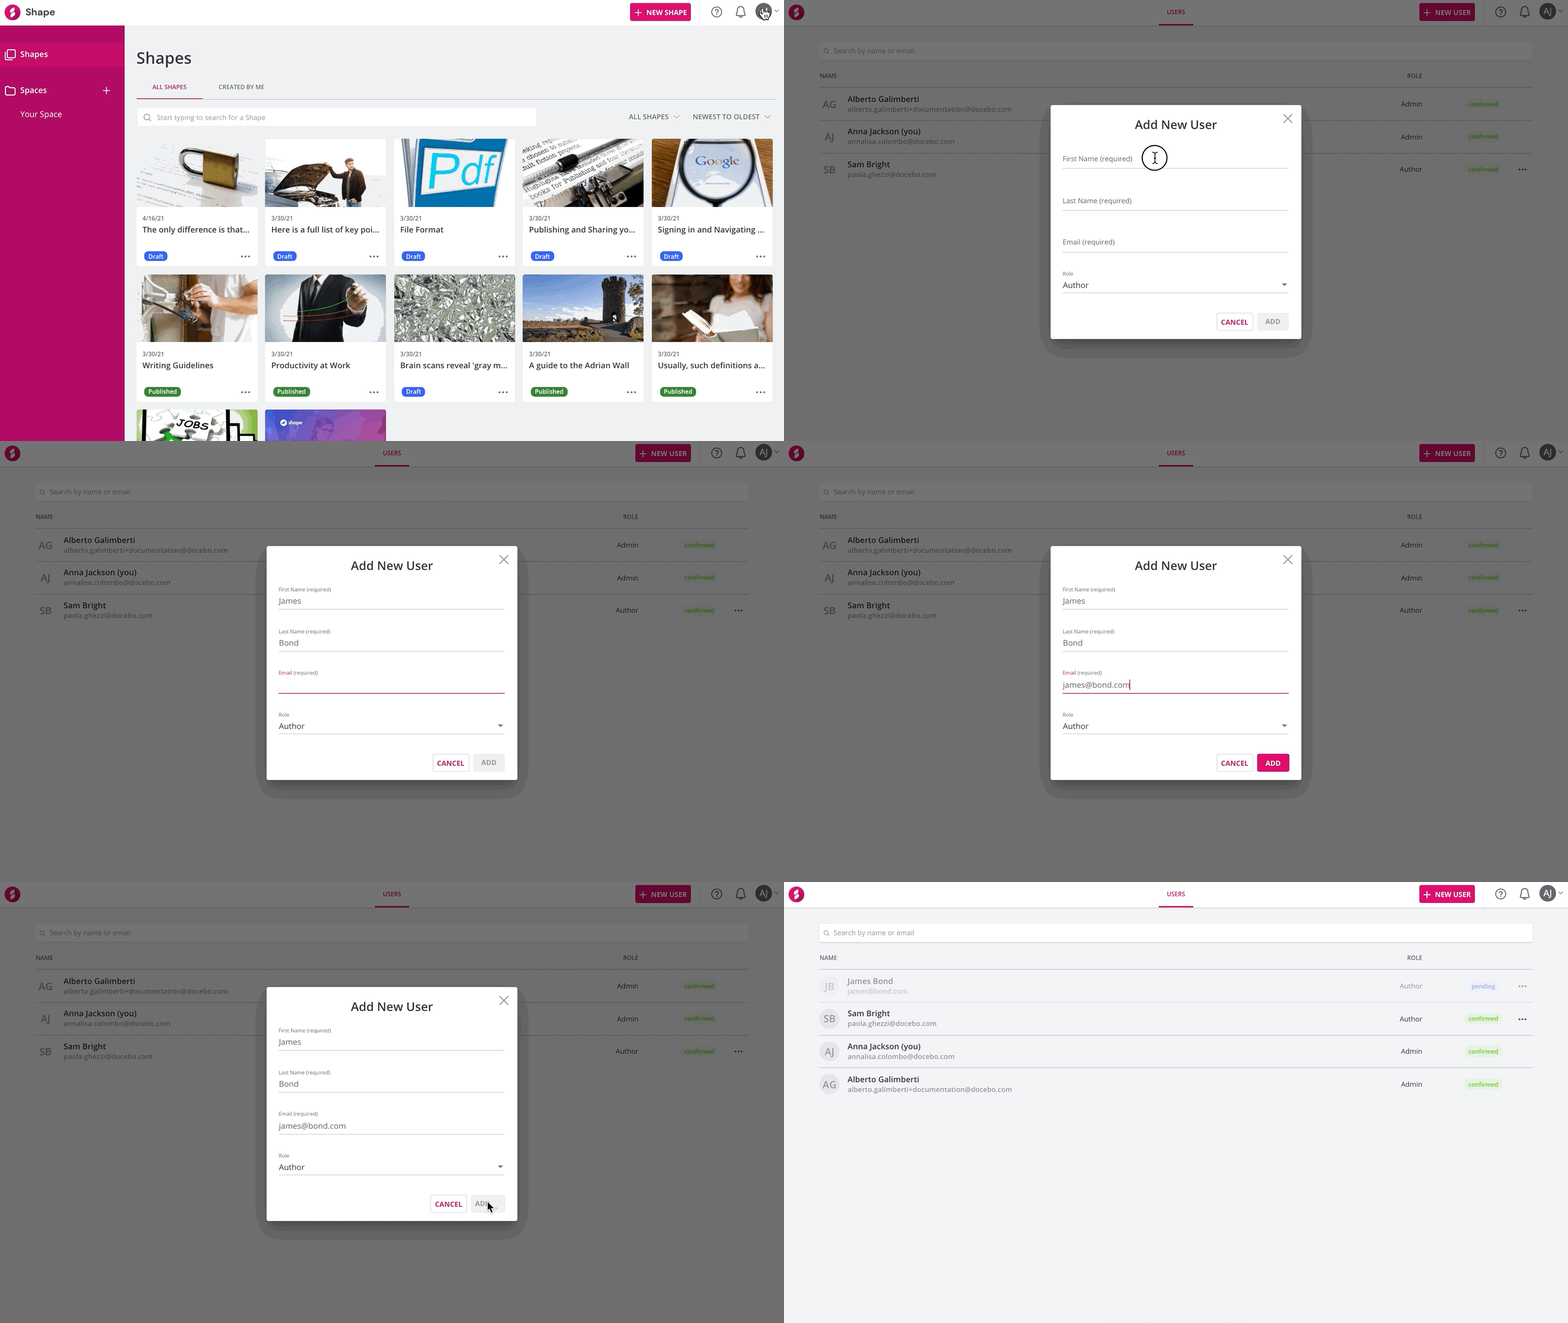
To create a new user, log in to your platform as the Admin, then click on your profile button in the top right corner of the page, and select the User Management option. You will access the Users main page, listing all of the users defined in your platform.
Click on New User in the page header, and fill in the user’s first name, last name, email address and select the user role (either Author or Admin). Click Add to complete the creation process.
Please note that the user email must be unique throughout all of the Shape platforms. This means that if a user is registered on a Shape platform, he or she cannot sign up for another platform and cannot be registered with the same email as a user (any type of user) in other Shape platforms.

The user will receive an email as a confirmation of the registration. The email includes the username (the user’s email address) and a link for the configuration of the user’s password.
Editing and Deleting a User
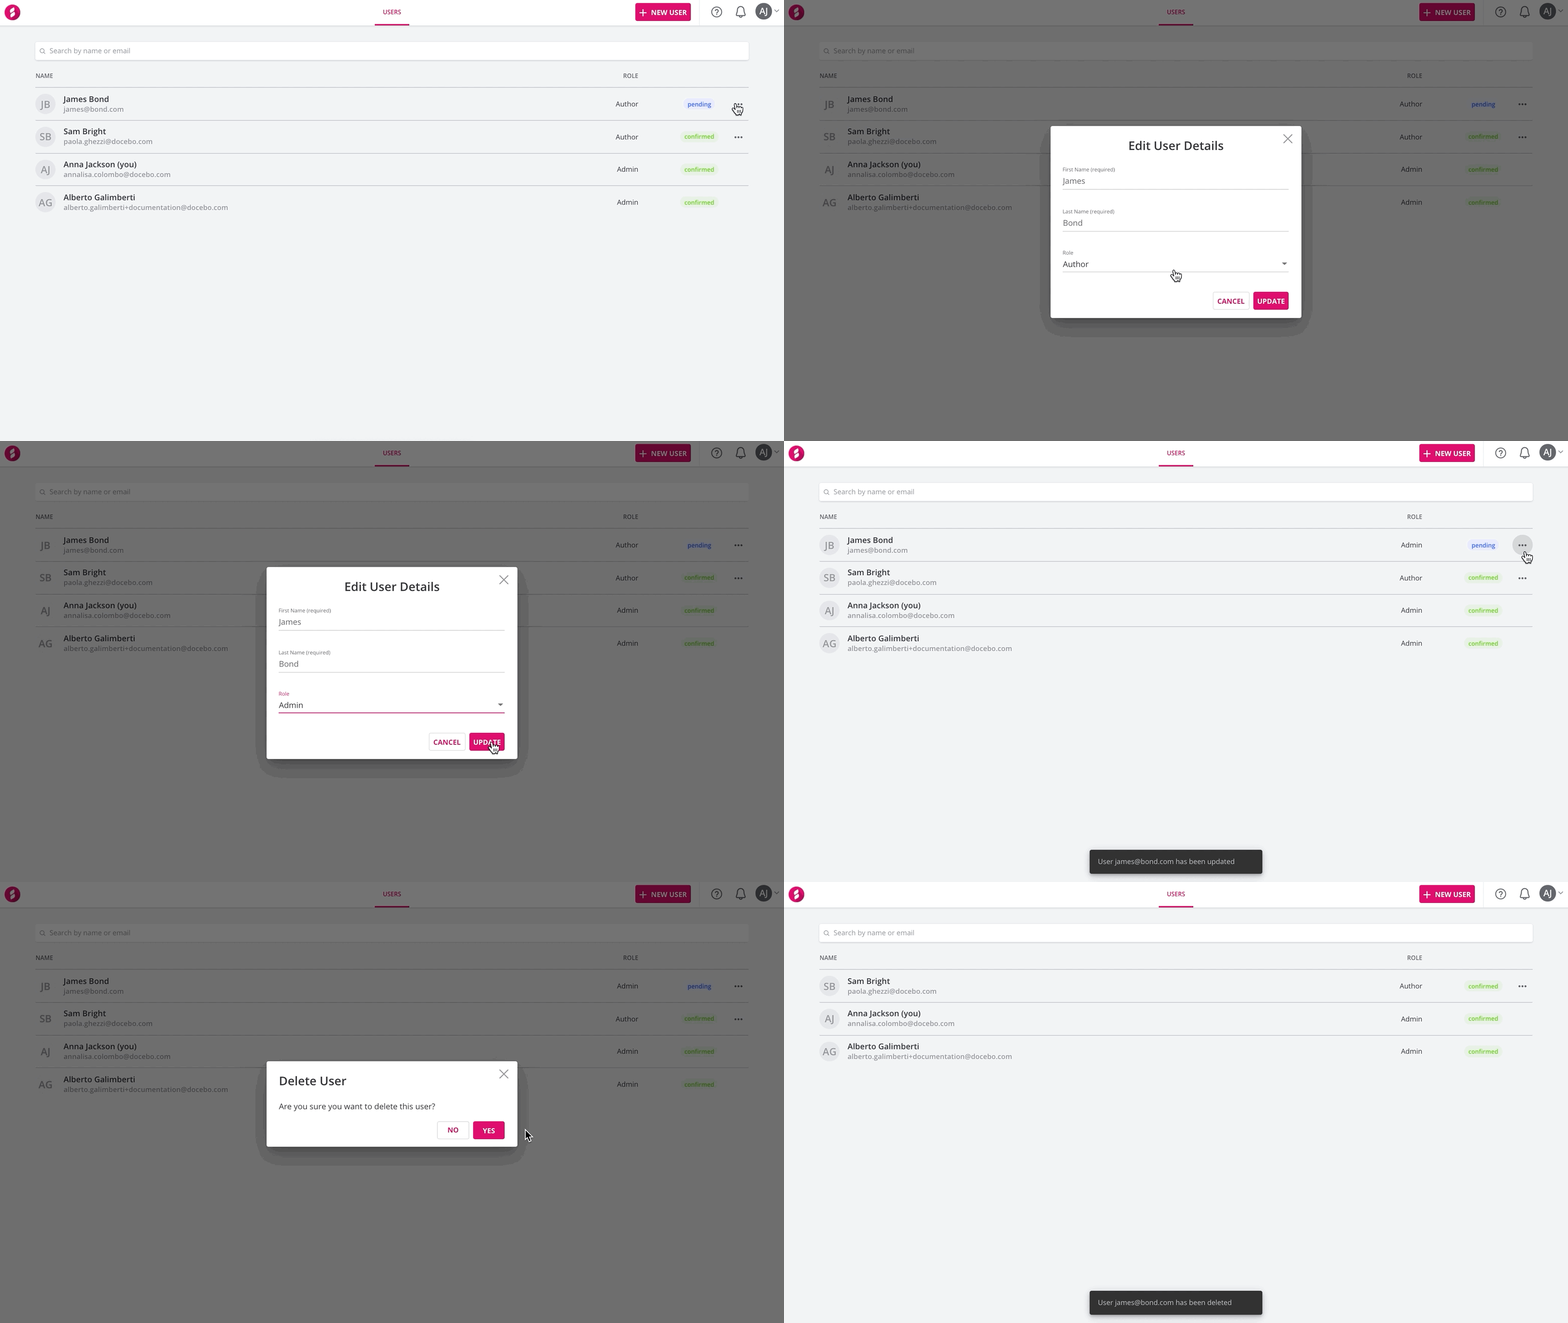
To edit the details of a user, from the Users page, find the user you want to edit, click the ellipsis button at the end of the user’s row and select Edit. In the pop-up box, edit the information you need to change and press Update.
When editing users, if you are the Admin who created the Shape instance, you can edit the details of any user, including other Admins, except for yourself. If you are not the Admin who created the Shape instance, you can edit the details of any user, including other Admins, except for yourself and for the Admin who created the Shape instance.

To delete a user, click on the ellipsis button at the end of the user’s row and select Delete. When you delete a user the themes and the content created by said user will still be kept in Shape.